
Edgium / Panel guide
Edgium panel guide for CDN and DNS
The Edgium panel puts the CDN and the DNS of your site in one place. This guide shows how to sign in, find your way between account, domain and subdomain, put a new site on the CDN and look after your account, with an explanation of what each screen means.
All images were taken in a demo environment with fictitious data: example domains, documentation addresses and simulated traffic. The numbers illustrate how to read each screen and do not represent any customer. The panel is shown in its Portuguese interface; it is also available in English.
In this guide
- Signing in
- Navigation: account, domain and subdomain
- New subdomain: the step-by-step wizard
- Defaults already on
- What to check before pointing DNS
- Profile, password, deletion and cache
- Need help?
Other panel guides:
- Panel guide: sign in, navigation and new subdomain (this page)
- Analytics and WAF logs: how to read them and what to do
- DNS: review, undo and history
Signing in
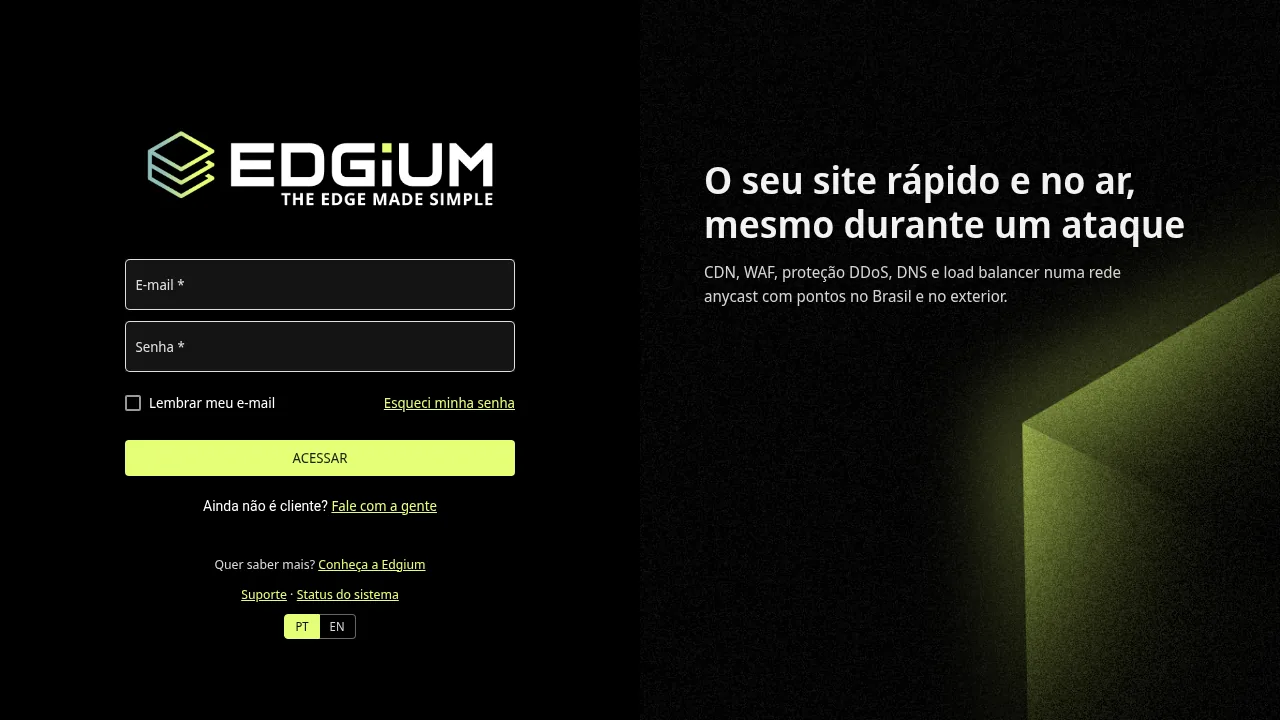
Accounts are created by the Edgium team. On the sign-in screen, people who are not customers yet find the Fale com a gente (Contact us) link. Customers sign in with email and password and, if they forget the password, use Esqueci minha senha (Forgot my password). The panel is available in Portuguese and English, with the PT | EN switch on the screen itself.
Navigation: account, domain and subdomain
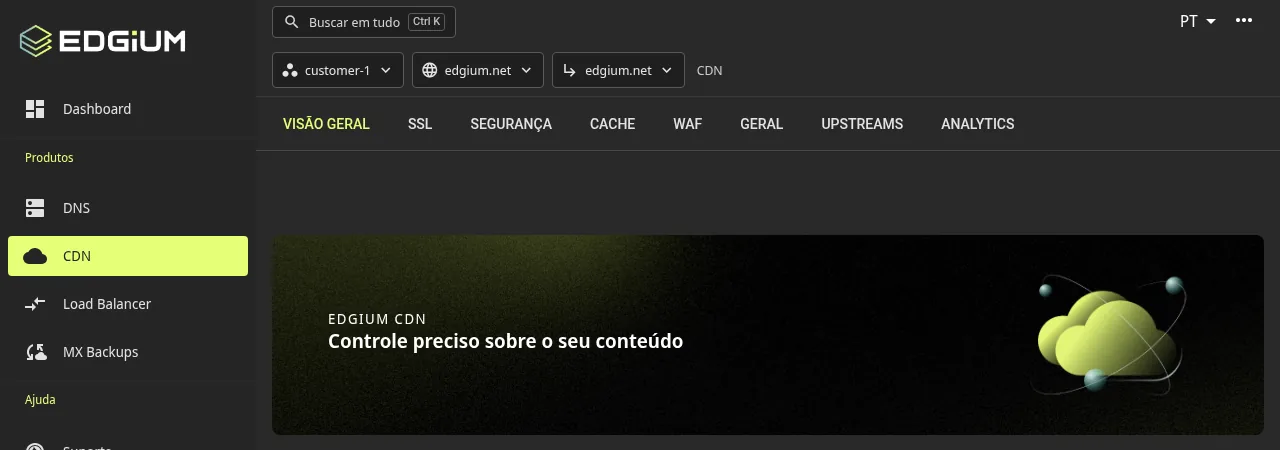
The panel has three levels, always visible at the top of the screen: Account > Domain > Subdomain.
- The left menu leads to the products, such as DNS and CDN, and to help (Support and System status).
- Inside a CDN subdomain, the tabs bring everything together: Overview, SSL, Security, Cache, WAF, General, Upstreams and Analytics.
- The Search everything field (shortcut
Ctrl + K) opens a search to jump straight to any screen.
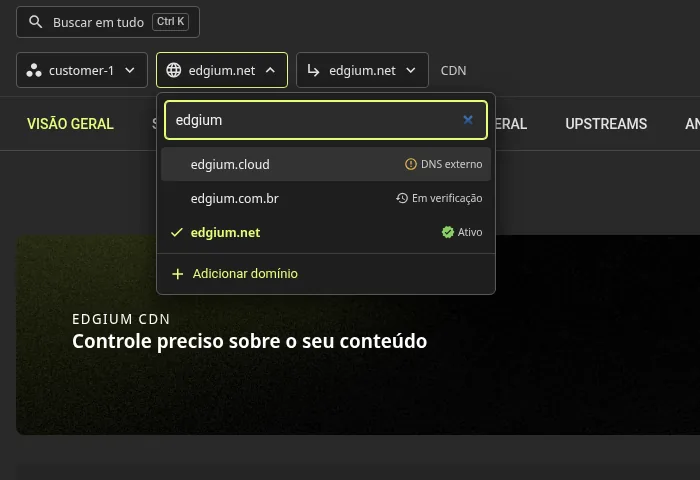
The domain selector has a search and shows the status of each domain, such as Active, External DNS or Verifying. When you switch domains, every tab shows the new one.
New subdomain: the step-by-step wizard
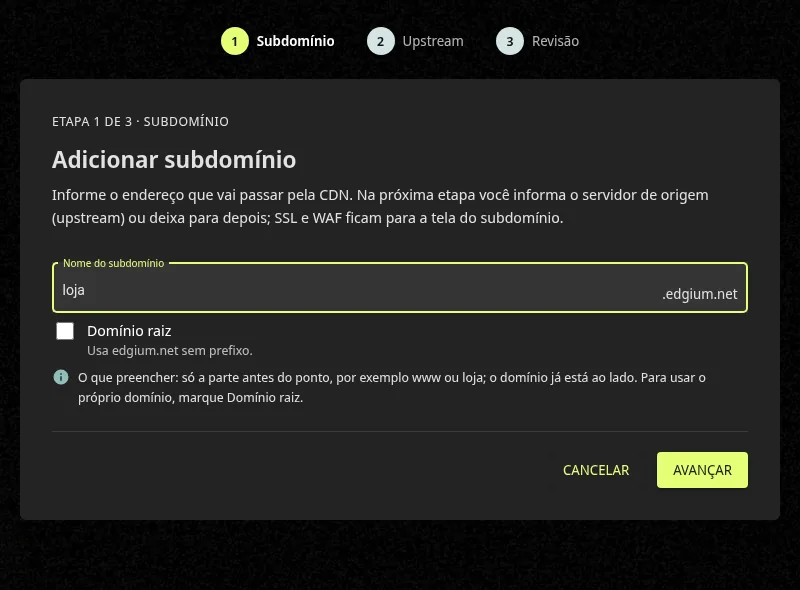
To put a site on the CDN, click Add subdomain on the CDN home screen. The wizard has 3 steps.
Step 1: subdomain
Fill in only the part before the dot, such as www or shop; the domain already appears next to it. To use the domain itself, with no prefix, check Root domain.
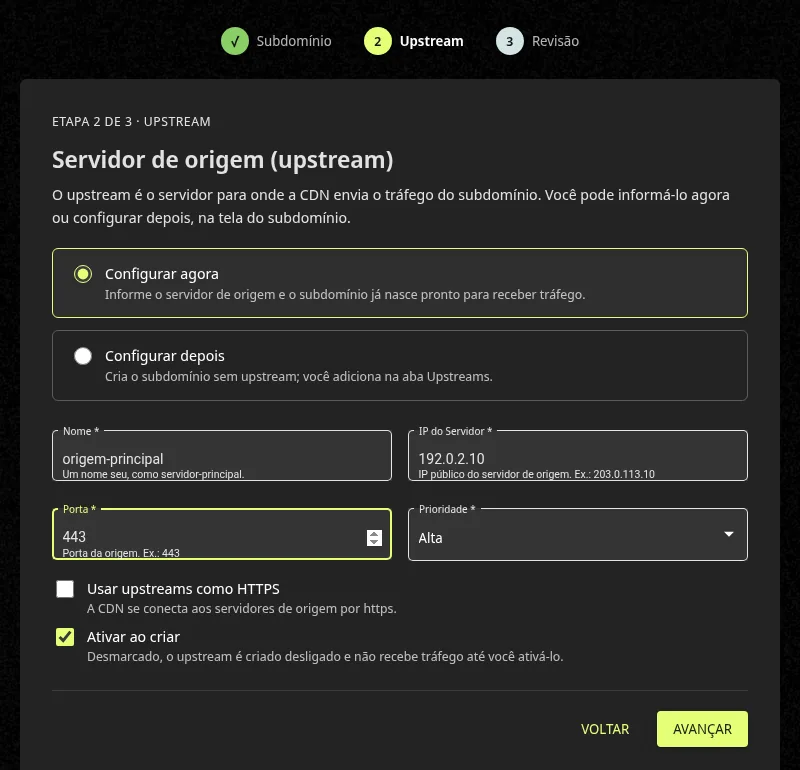
Step 2: origin (upstream)
The origin, also called upstream, is your server: where the CDN fetches whatever is not cached yet. Enter now the server the CDN will send traffic to, or choose Configure later.
- Name: a name of your own, such as "main-server".
- Server IP: the public address of your origin server.
- Port and Priority (the highest is the default).
- Use upstreams as HTTPS: check it if the CDN should talk to your server over HTTPS.
- Activate on creation: checked by default. If you uncheck it, the origin is created off and only receives traffic once you activate it.
Step 3: review
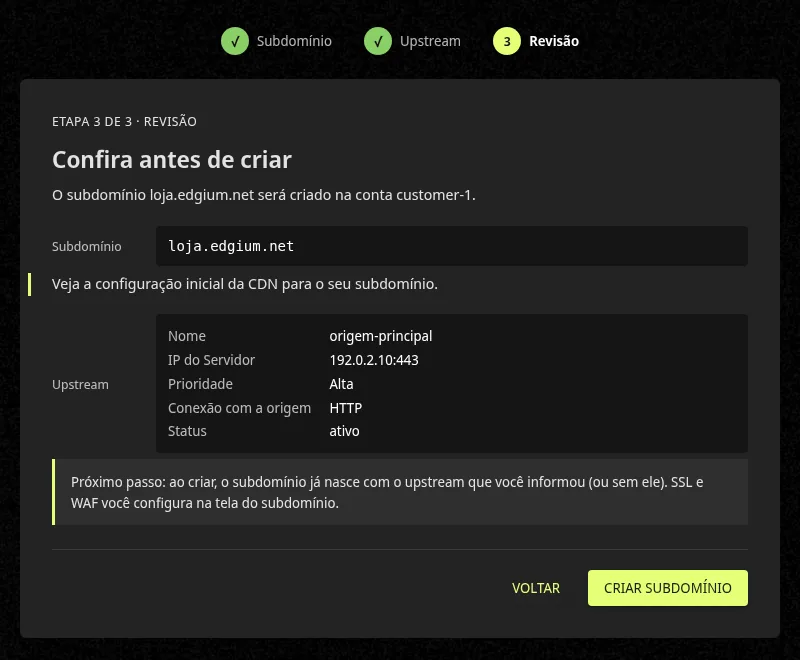
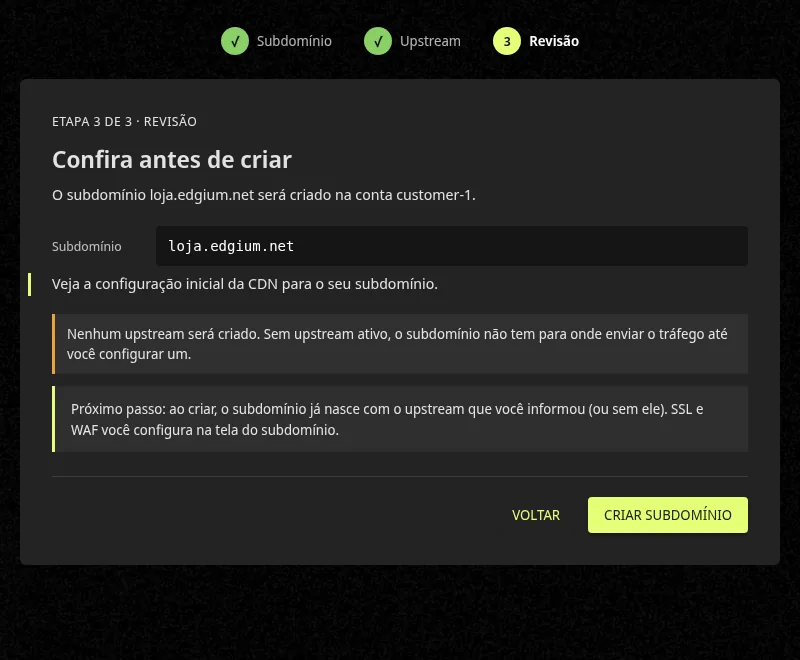
The screen summarizes the subdomain and the origin before creating. If you chose to configure the origin later, the panel reminds you to add and activate one on the Upstreams tab, so the subdomain has somewhere to send traffic.
Defaults already on
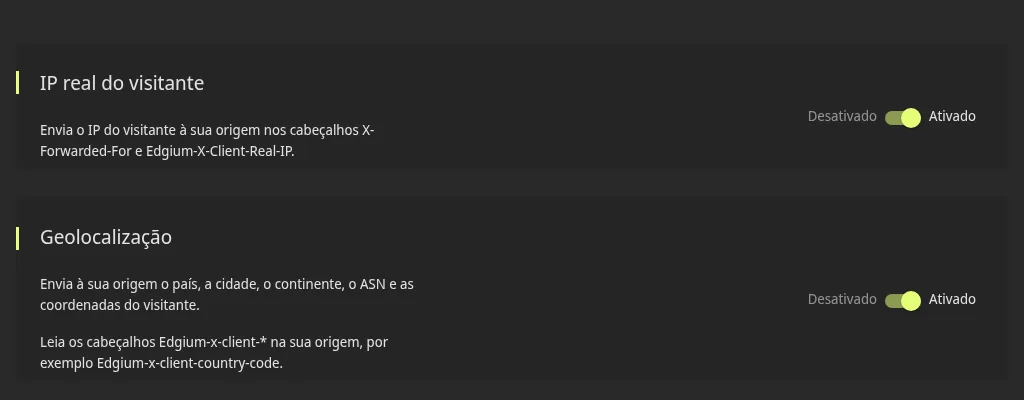
Every new subdomain starts with the real visitor IP and geolocation turned on, so your server knows who each visit comes from and where. The General tab shows them and lets you change them. When you turn on HTTPS, the HTTP to HTTPS redirect and HTTP/2 also come on.
What to check before pointing DNS
- The origin answers. Your server is up, on the chosen port, and accepts connections coming from Edgium. If it has a firewall, allow the Edgium addresses (see the list).
- The origin is active on the Upstreams tab. An origin that is off receives no traffic.
- The connection mode is right. If your server only serves HTTPS, check "Use upstreams as HTTPS".
- The CDN addresses are at hand. The Overview tab lists where your site DNS should point. If you use Edgium DNS, the
wwwrecords are created for you. - The certificate. The free certificate (Let's Encrypt) is issued after the DNS points to the CDN. Point the DNS, wait for propagation and issue it on the SSL tab.
- Lower the TTL in advance. If you can, reduce the TTL of the current record a few hours before the switch, so a rollback is quick.
- Test and watch. After pointing, open Analytics and check requests, 5xx errors and origin health.
Profile, password, deletion and cache
Profile and password change
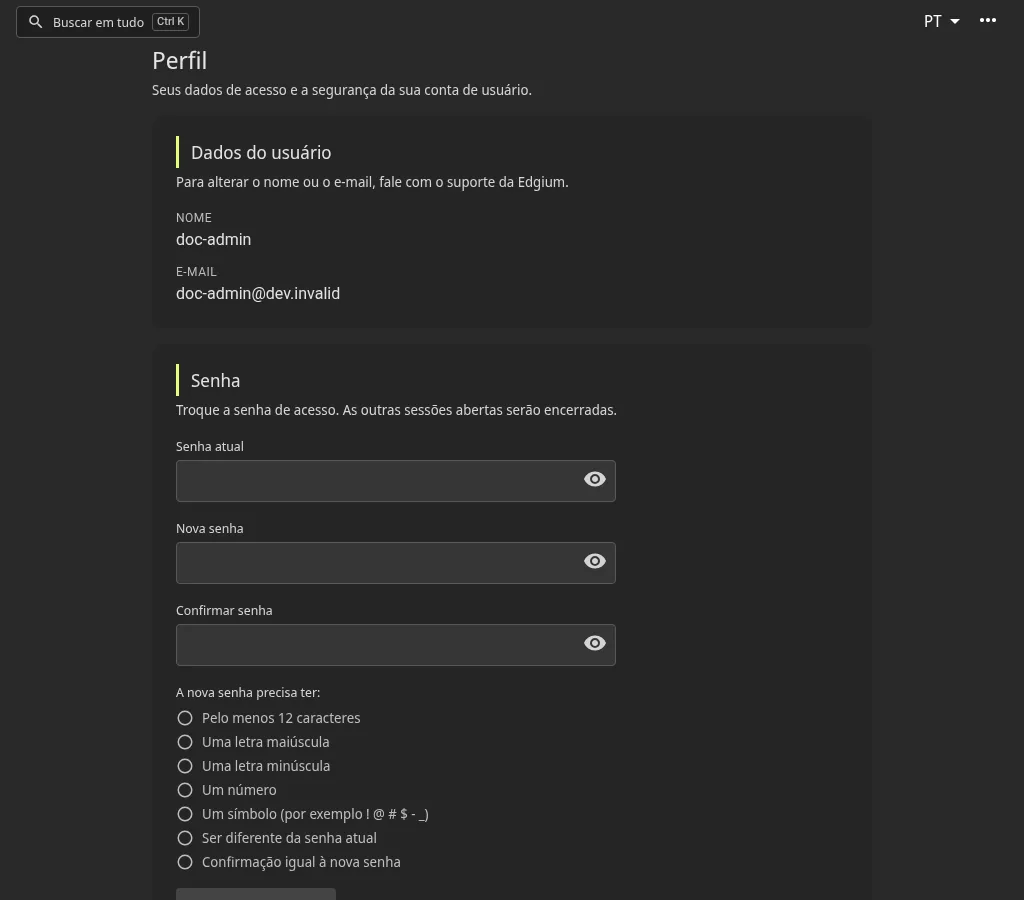
In the menu at the top right (the three dots) you find the Profile. It shows your name and email (to change them, contact support) and lets you change your password. The new password has at least 12 characters, with an uppercase letter, a lowercase letter, a number and a symbol, and differs from the current one. The screen ticks each requirement as you type, and your other open sessions are ended after the change.
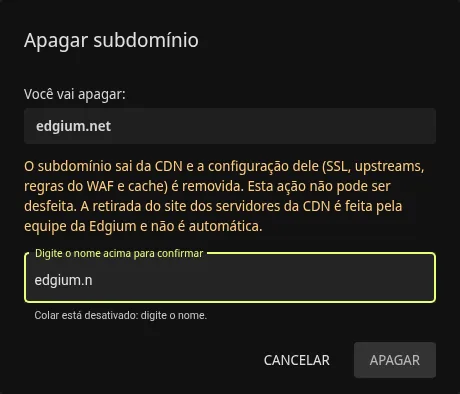
Type the name to confirm before deleting
To avoid deleting the wrong domain or subdomain, the panel asks you to type the name to confirm. The Delete button is only enabled when the text matches. The message makes clear what will be removed: SSL, origins, WAF rules and cache.
HTTP/2 always on
On the Security tab, the panel shows that HTTP/2 is always on for HTTPS connections: your site already delivers with the modern protocol, with nothing to configure.

Cache: two options, two roles
On the Cache tab, two similar options do different things:
- Expiration time: how long the visitor's browser keeps the files.
- Cache TTL: how long the CDN keeps successful responses (200 and 206) in cache before fetching again from your origin.
The screen always shows the saved value, even when it is a custom time.
Need help?
- No account yet? Use the Fale com a gente link on the sign-in screen or the site contact form.
- A question or a problem? Open a ticket under Support, inside the panel, or follow the System status.
- When you ask for help with an error, include the subdomain, the period and, if possible, a screenshot. It speeds up the answer.
Frequently asked questions
How do I put a site on the Edgium CDN?
In the panel, open the CDN and click Add subdomain. The wizard has 3 steps: the subdomain name, the origin (your site's server) and the review. Then point the DNS to the CDN and issue the free certificate on the SSL tab.
What is the origin (upstream)?
It is your server, where the CDN fetches whatever is not cached yet.
What is the difference between Expiration time and Cache TTL?
Expiration time sets how long the visitor's browser keeps the files. Cache TTL sets how long the CDN keeps successful responses before fetching again from your origin.
How do I change my panel password?
In the menu at the top right, open Profile. The new password needs at least 12 characters, with an uppercase letter, a lowercase letter, a number and a symbol, and must differ from the current one. Your other open sessions are ended after the change.
No panel account yet?
Accounts are created by the Edgium team. Tell us your domain and we will prepare your access and a trial with your site.